This article provides steps for migrating a site with AD / LDAP-authenticated users to use our Entra ID integration. If you don't have AD configured but would like to configure Entra ID integration, please see this article.
At a high level, the following things happen as a result of a migration:
- The old domain value is validated against the new domain value to ensure that they match.
- AD / LDAP is deactivated.
- ADFS / Entra ID is set as the Authentication Type for all previously AD / LDAP-authenticated users.
- The following fields are populated for each user account:
- Authentication Type: ADFS / Entra ID
- Active Directory User SID
- Domain
- The mappings from Active Directory are transferred to Entra ID.
- Any "Map Additional Attributes" are also mapped to the "User Property Mapping".
Part 1: Perform an Active Directory User Import
This step ensures that AD-authenticated users in Issuetrak have the appropriate properties set for SID, Domain, and Authentication Type. Failure to perform this step could result in duplicate user creation when users sign into Issuetrak.
Steps:
- Click the gear icon in the upper right > click on Active Directory beneath Identity Management > click on Import Users from the right context menu.
- Select the Domain from the dropdown for which this particular import should be performed from the list.
- Click the radio button to select either AD Group or AD OU. Click the button related to your selection. Only AD Groups or OUs with verified Organization and Permissions mappings and valid users will appear.
- Select the appropriate value in the window that appears.
- Click the Preview Import button.
- Verify the import is being returned properly in the Preview import window that appears.
- Close the Preview Import window.
- Click the Process Import button to process this import.
- Repeat the import process for as many OU/Groups as necessary to account for your AD environment and ensure all of your users will be able to authenticate.
Part 2: Preparing your Entra ID Instance
Please see this article for steps to configure your Entra ID instance to work with Issuetrak.
Part 3: Complete the Migration
With the information gathered from the initial preparation, we can migrate to Entra ID in Issuetrak.
Steps:
- Navigate to your Issuetrak site and log in with a Sys Admin account.
- Click the gear icon in the upper right > click on Entra ID beneath Identity Management.
- Choose Migrate from AD from the right context menu.
- Check the box next to "Perform an Active Directory user import".
- Check the box next to "Setup Entra ID Account (Guide)".
- Populate the following data:
- Domain: The Domain of your Entra ID instance. Ensure this matches the domain currently in your Issuetrak instance's AD settings.
- Application: The name of the Microsoft application you added to Issuetrak in the previous section.
- Button Label: The name of the button to display on the Issuetrak Login page.
- Double-check the values you've entered and confirm that you are ready to migrate to Entra ID. Click Migrate Server Settings to save the settings.
- Click Perform Migration to finalize the process.
- You will be redirected to the Edit Entra ID page. Click the Test Connection button. This will launch a new browser tab to your Entra ID instance's authentication page. Sign in with your AD credentials and accept the prompt that requests permission to view your account information. You will then be taken to another page to view the Test Connection results. See this section for more information about the permission prompt.
- Optional: Customize the appearance of this identity provider's button on the login screen by using the fields on the right-hand side.
Creating User Mappings for Entra ID
The final step to configuring Entra ID is to create mappings for user accounts. Without a minimum of Organization and Template mappings, users will be unable to sign in using the identity provider you configured.
Issuetrak uses identity claims to map users to the correct organizations, user templates, locations, departments, and any user account UDFs that are configured. This is more constrained than using traditional mappings from AD or AD Federation Services.
Mapping User Templates
Steps:
- Sign into Issuetrak with a Sys Admin account.
- Click the gear icon in the upper right > click on Entra ID beneath Identity Management.
- Click edit next to the domain that you wish to set mappings for.
- Find Define Template Mapping.
- Set the Priority. Priority determines whether this mapping takes precedence over other mappings of the same type that match. A lower number indicates a higher priority.
For example, if two User Template mappings named Alpha (Priority 1) and Bravo (priority 2) are matched to the same user account, the mapping with the higher priority (lower number) takes precedence. Thus, a user account that matches both templates' criteria will be mapped to Alpha.
- Enter the name of the Claim that will be scanned by Issuetrak to determine the origin of this mapping.
- Enter the Matching Value that applies to the claim.
- Select which User Template this claim should be mapped to upon a successful match.
- Click Save.
Mapping Organizations
Steps:
- Sign into Issuetrak with a Sys Admin account.
- Click the gear icon in the upper right > click on Entra ID beneath Identity Management.
- Click edit next to the domain that you wish to set mappings for.
- Find Define Organization Mapping.
- Set the Priority. Priority determines whether this mapping takes precedence over other mappings of the same type that match. A lower number indicates a higher priority.
For example, if two Organization mappings named Alpha (Priority 1) and Bravo (priority 2) are matched to the same user account, the mapping with the higher priority (lower number) takes precedence. Thus, a user account that matches both Organizations' criteria will be mapped to Alpha.
- Enter the name of the Claim that will be scanned by Issuetrak to determine the origin of this mapping.
- Enter the Matching Value that applies to the claim.
- Select which Organization this claim should be mapped to upon a successful match.
- Click Save.
Mapping Locations
Steps:
- Sign into Issuetrak with a Sys Admin account.
- Click the gear icon in the upper right > click on Entra ID beneath Identity Management.
- Click edit next to the domain that you wish to set mappings for.
- Find Define Location Mapping.
- Set the Priority. Priority determines whether this mapping takes precedence over other mappings of the same type that match. A lower number indicates a higher priority.
For example, if two Location mappings named Alpha (Priority 1) and Bravo (priority 2) are matched to the same user account, the mapping with the higher priority (lower number) takes precedence. Thus, a user account that matches both Locations' criteria will be mapped to Alpha.
- Enter the name of the Claim that will be scanned by Issuetrak to determine the origin of this mapping.
- Enter the Matching Value that applies to the claim.
- Select which Location this claim should be mapped to upon a successful match.
- Click Save.
Mapping Departments
Steps:
- Sign into Issuetrak with a Sys Admin account.
- Click the gear icon in the upper right > click on Entra ID beneath Identity Management.
- Click edit next to the domain that you wish to set mappings for.
- Find Define Department Mapping.
- Set the Priority. Priority determines whether this mapping takes precedence over other mappings of the same type that match. A lower number indicates a higher priority.
For example, if two Department mappings named Alpha (Priority 1) and Bravo (priority 2) are matched to the same user account, the mapping with the higher priority (lower number) takes precedence. Thus, a user account that matches both Departments' criteria will be mapped to Alpha.
- Enter the name of the Claim that will be scanned by Issuetrak to determine the origin of this mapping.
- Enter the Matching Value that applies to the claim.
- Select which Department this claim should be mapped to upon a successful match.
- Click Save.
User Property Mappings
There are several claims automatically mapped by default for Street Address, City, State, etc. These can be edited or deleted if necessary.
Additionally, three claims are mandatory and automatically mapped to fields for each user. They are mapped as follows:
- SamAccountName > User Id
- GivenName > First Name
- LastName > Last Name
Any other Claim can be mapped to any UDF or unused field in a user account.
Mapping User Properties
Steps:
- Sign into Issuetrak with a Sys Admin account.
- Click the gear icon in the upper right > click on Entra ID beneath Identity Management.
- Click edit next to the domain that you wish to set mappings for.
- Find Define User Property Mapping.
- Enter a Claim name.
- Select the field in the dropdown to map the Claim to.
- Click Save.
Testing User Mappings
The Test User Mappings button provides the capability to authenticate a user account and immediately display the mappings that are applied to that account. It is recommended for customers to test user account mappings by creating a 'dummy' AD account that has the same mappings as the target user(s), then authenticate that user via the Test User Mappings prompt to check the mappings.
Even if you're just testing the mappings, if it's the first time Issuetrak is attempting to authenticate via Entra ID, then it will display a prompt that may seem unexpected. See the section below for more information on this.
First Time Signing into Issuetrak via Entra ID
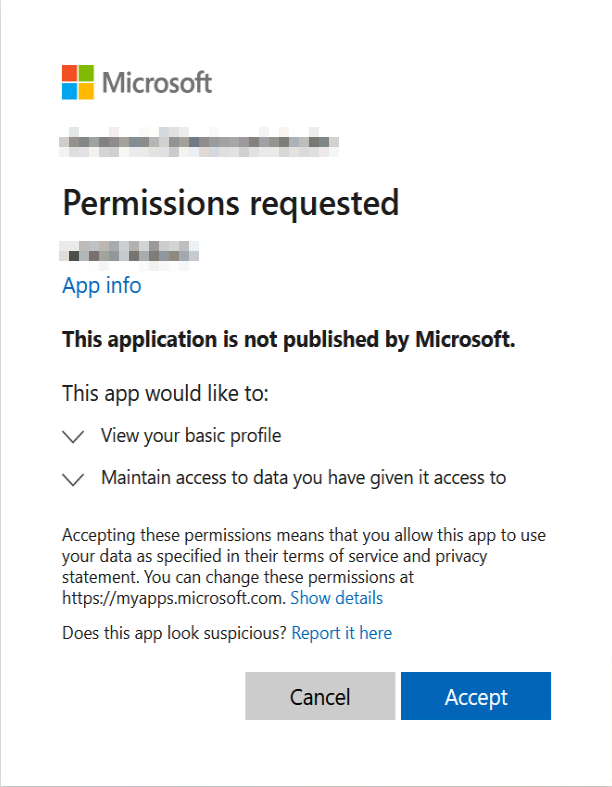
The first time you attempt to sign into Issuetrak with your Entra ID credentials, you will be greeted with a prompt in your browser to provide permissions to Issuetrak to use Entra ID for authentication. You must accept this in order for Entra ID integration with Issuetrak to work.
The prompt will look something like this: